Redmine is a project management and issue tracking software that’s written using the Ruby on Rails framework.
It’s primarily used by developers and offers a basic time tracking feature. With this feature, users can track the amount of time they work on a particular project or issue.
But how does it work, and does it have any alternatives?
In this article, we’ll look into how to use the native Redmine time tracking feature. We’ll also discuss its limitations and introduce four time tracking alternatives.
Table of Contents
- How Redmine time tracking works
- 4 main limitations of time tracking using Redmine
- 4 popular tools for Redmine time tracking
Let’s get started.
How Redmine time tracking works
Redmine’s time tracking feature lets an employee categorize each entry of “spent time” by activity. With these time estimates, a project manager can accurately calculate billable hours, develop better project plans, and track their team’s performance progress.
Redmine offers three different ways to track billable hours. They are:
- With Redmine’s built-in tracker.
- With Redmine’s time tracker plugin.
- Via the commit messages features.
Let’s look into these different time tracking techniques in detail:
1. With Redmine’s built-in tracker
In this method, you need to enable or disable Redmine’s manual time tracker module for each project. You can do this in the Modules section of the new project form or the Settings tab of an existing project.
There are two ways to log time with the native time tracker.
A. Log time for an issue
To log time spent solving an issue:
- Go to the Issue Details view.
- Click on Log time.
- In the Hours field, add the time spent on the issue.
- Click Save.
Note: You can also log time for an issue while making any updates to the issue.

B. Log time for a project
To log time for a particular project:
- Go to the Issue Details view.
- Click on Log time but leave the Issue field empty.
- Add the time spent on the project in the Hours field.
- Click Save.
2. With Redmine’s time tracker plugin
Redmine’s time tracker plugin offers a manual time tracker in the form of a timer that lets you start and stop recording working time.
Before employees can use the timer, an administrator will have to install the Redmine plugin. After installation, you can:
- Setup the database using the migrations.
- Login to your Redmine as an administrator.
- Input the ‘log time’ permissions for your roles.
- Add ‘Time tracking’ to the enabled modules for your project.
- Spot the link to the plugin in the ‘account’ menu bar.
After this, the employee can easily track time by:
- Clicking Start to begin recording time for a task.
- Hitting the Pause button to take a break.
3. Via the commit messages features
The tool offers a handy feature for developers who integrate SCM (Source Code Management) systems with Redmine. They can register ‘spent time’ against an issue via their commit messages. A commit message explains the changes they’ve made to a project.
To activate this, you need to:
- Go to Application settings > Repositories.
- Choose the Activity you want to log time under.
- Activate Enable time logging option.
Redmine’s other features include multiple project support, Gantt chart and time report generation, etc. It offers forums for users of a particular project to communicate and wikis for each project to encourage self-service.
However, Redmine’s native time tracker has some main major limitations. Let’s look at them.
4 main limitations of time tracking using Redmine
Here are the four limitations of time tracking using Redmine:
1. Under-developed UI (User Interface)
Redmine’s UI is less user-friendly when compared with the intuitive interfaces of other productivity and project management tools.
Since Redmine is an open-source tool primarily used by developers, other employees may be unable to navigate through the tool to track time effectively.
Additionally, you may find it difficult to access data as the app doesn’t clearly show the time tracked. As a result, you may not be able to check employees’ work hours in real-time.
2. Poor reporting features
Redmine’s native time tracking feature only generates a time log report, which can make it difficult to assess employee time use.
Also, it only generates reports for the time logged for various Redmine issues and projects. It doesn’t give any additional insight into other employee activities, websites and apps used, wasted time, etc.
3. Tricky installation
Installing Redmine can be confusing and time-consuming as it needs you to follow a complex list of steps, like creating an empty database and configuring a database connection.
You may have to train employees or hire an IT team to install Redmine – which wouldn’t be required for other project management tools.
4. Manual time tracker only
Redmine’s native time tracker requires employees to log time entries manually and doesn’t have any automatic options.
Due to the absence of an automatic time tracker, risks of human error and inaccurate productivity assessment increases. Moreover, employees could forget to track time with only a manual tracker.
Although it offers a manual time tracker plugin, it’s hard to install and use when compared to an automatic time tracker.
Fortunately, you can integrate Redmine with a dedicated time tracking tool for improved functionality. Let’s look at a few of them.
4 popular tools for Redmine time tracking
Here are four great apps for more comprehensive time tracking and productivity management:
1. Time Doctor
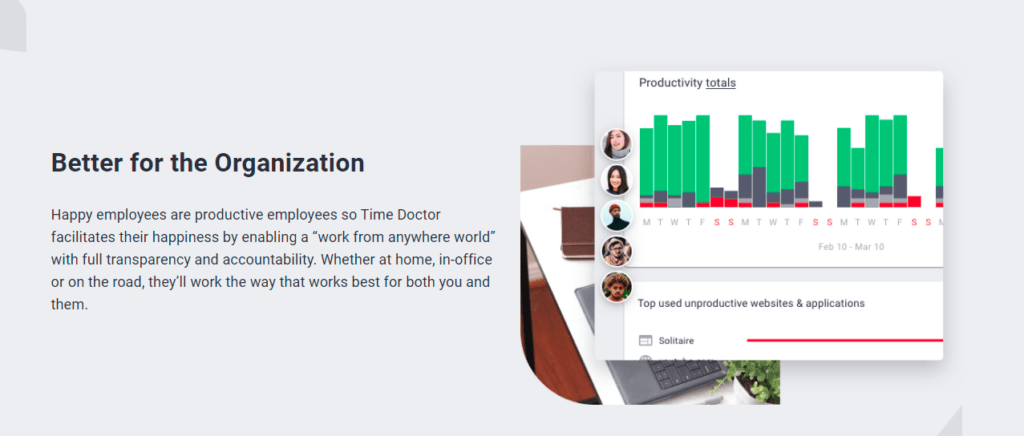
Time Doctor is a time tracking and project management software that is used by small businesses like Thrive Market, as well as huge enterprises like Ericsson. It helps you track the time an employee takes to wrap up a specific task or issue easily.
Additionally, the tool offers a Redmine time tracking integration.
Time Doctor’s Chrome Extension for Redmine Time Tracking
Time Doctor’s Chrome browser extension lets you track time against tasks on 50+ third-party apps, including Redmine, Jira, Microsoft Project, Freshbooks, Github, and more.
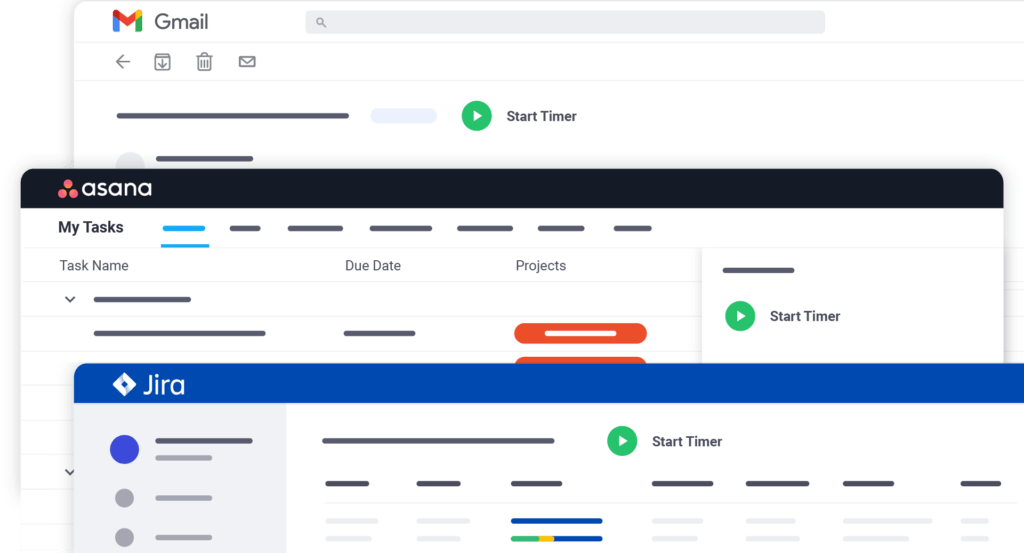
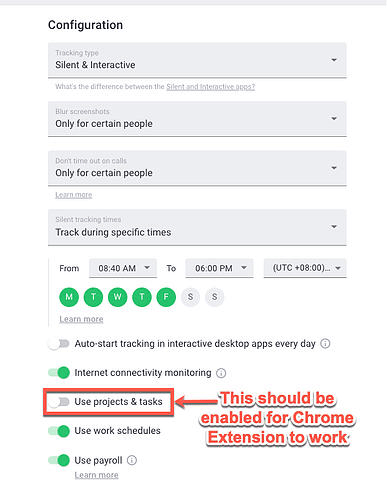
Ensure your team uses the Interactive time tracking feature to activate the Chrome extension.
Here are the steps to use Time Doctor’s Chrome extension to track time in Redmine:
Step 1
Go to Settings / Company Settings and enable the Projects & Tasks feature.
Step 2
Go to Settings, hit Integrations from the top menu, and enable the Chrome extension.
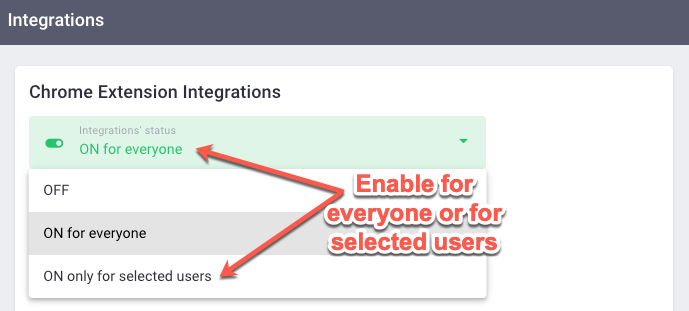
Note: Only admins can enable the Chrome extension.
Once enabled, you can send a notification to your team on their desktop apps to install the Chrome extension. Additionally, new employees joining your company will also be encouraged to install the Chrome extension as a part of the Time Doctor setup process.
Step 3
Navigate to the Redmine issue or project you want to track time for.
Step 4
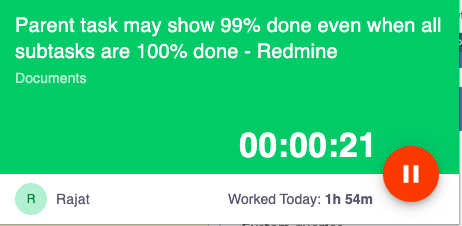
Click on Time Doctor’s Start Timer button to begin timing your work.
Step 5
Click on the Stop Timer button to pause or stop recording work hours.
The time tracked data is then sent to the Redmine server so that it’s reflected in the Redmine reports. Also, the Time Doctor extension syncs with the desktop app and shows all the tracked hours in the app.
Key features
Let’s now look at Time Doctor’s other user friendly features.
A. Silent and interactive time tracking
Time Doctor’s interactive and silent time tracker lets employees log work time accurately.
With the tool’s manual or interactive time tracking feature, the employee can start tracking working hours in real-time when they begin work and stop the timer when they end or take a break.
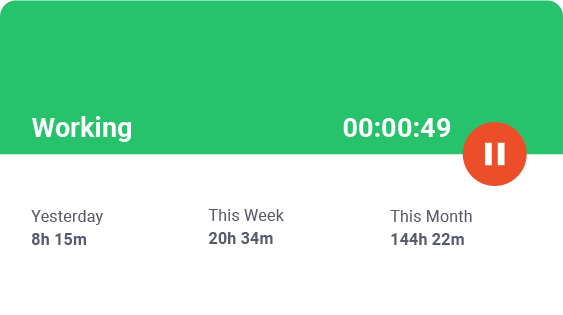
It also offers an automatic or silent time tracking feature that starts tracking time when an employee turns on their computer. The timer runs in the background and doesn’t interfere with the task they’re working on.
B. Idle time tracking
Time Doctor’s idle time tracker records the time an employee is inactive while the timer is running.
The tool detects the employee’s keystrokes and mouse movements and records the time when there’s no activity. When the inactive time crosses a preset time limit, the tool nudges the employee to resume work by showing an idle time pop-up alert.
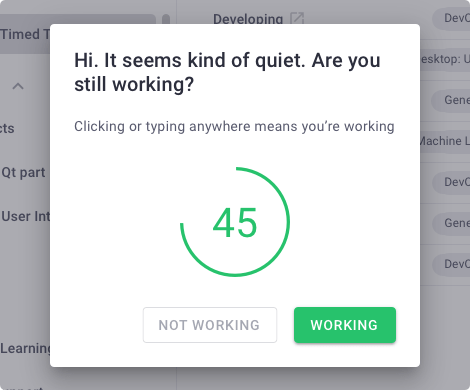
Note: Time Doctor isn’t a keylogger. It only detects whether the employee clicked any keys or moved the mouse.
C. Work schedules
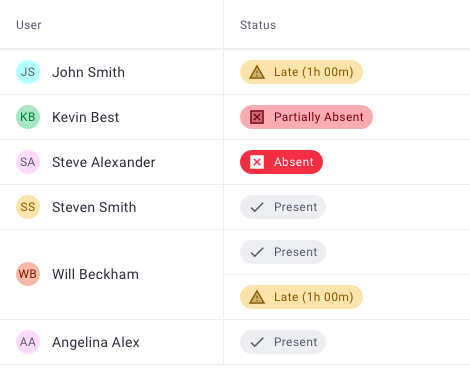
Using Time Doctor’s work schedule feature, you can create shifts for employees and track the time they spend on each shift.
You can also record whether an employee started their shift on time and worked a minimum number of hours. Based on the time tracked, the tool automatically assigns them attendance statuses, like ‘Absent’, ‘Present’, ‘Late’, or ‘Partially Absent.’
D. Screencasts (Optional)
Time Doctor allows you to take screencasts of employees’ screens to spot unproductive activities.
You can set the app to take screenshots after regular time intervals of 3, 15, or 30 minutes.
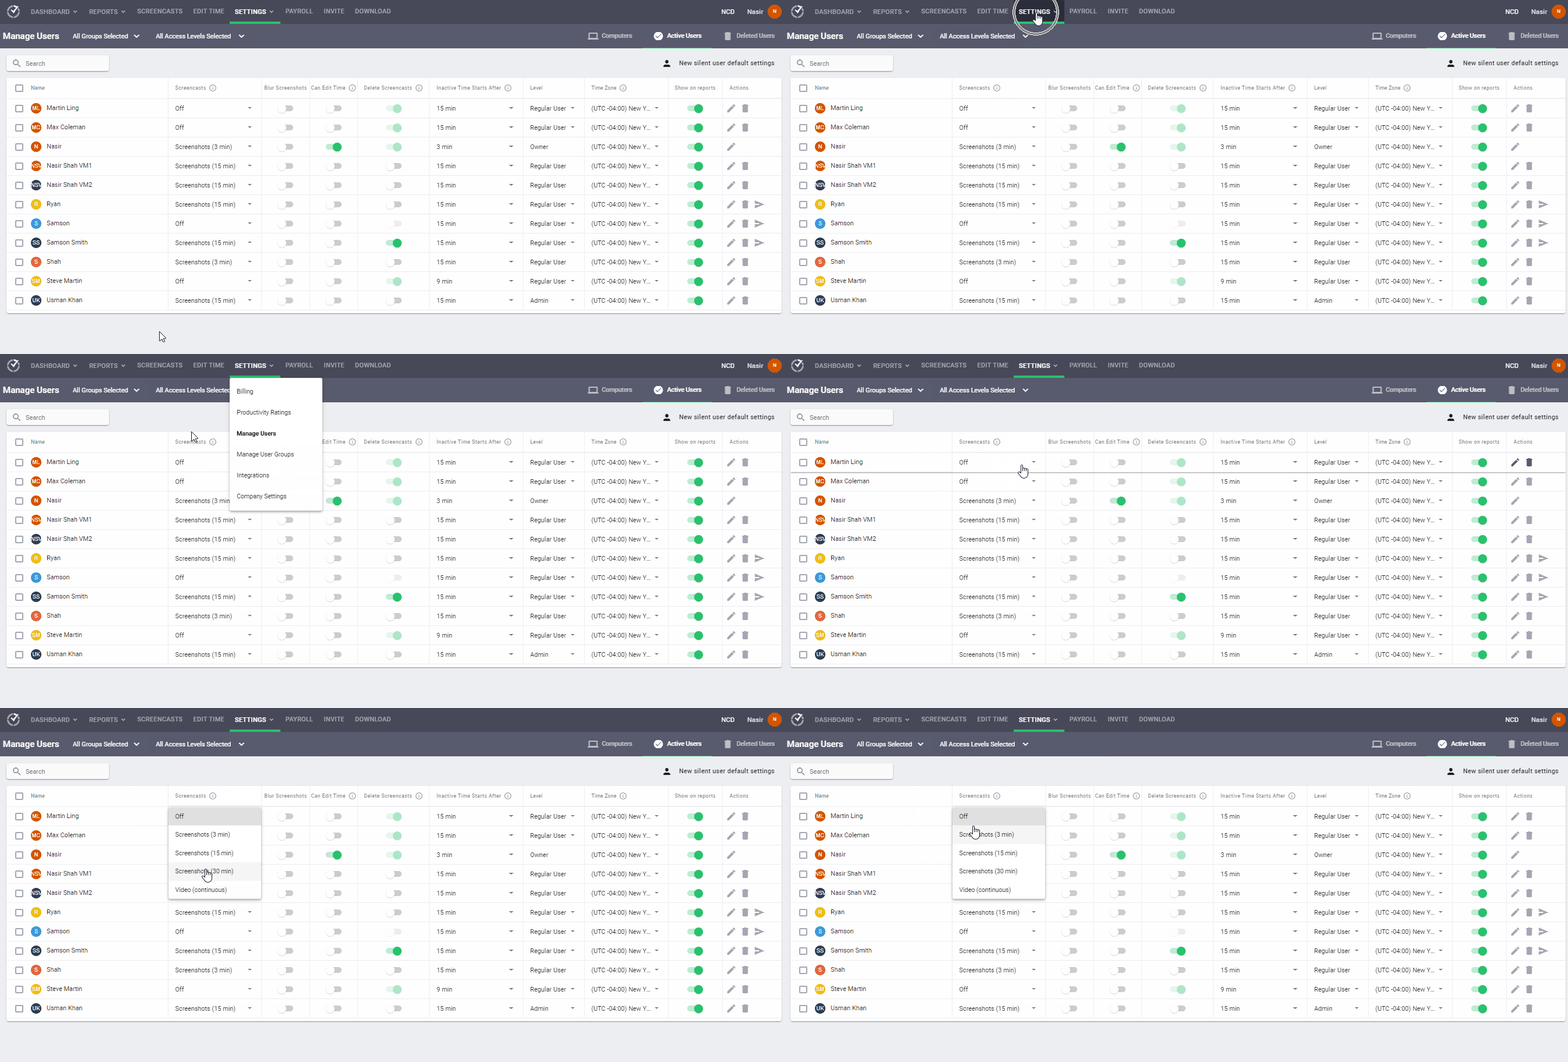
Note: Admins and managers can blur or delete an employee’s or team’s screencasts to protect their privacy.
E. Project and task management
The tool allows you to create projects and tasks and assign them to a group or employee.
You can also organize tasks by projects or with five default folders for better workflow.
Here are the five default folders the tool offers:
- Permanent Tasks: Tasks assigned by admins that can’t be marked as completed.
- Current Tasks: Tasks on which the employee is currently working.
- Next Tasks: Tasks that the employee will work on next.
- Future Tasks: Tasks that the employee will work on in the future.
- Completed Tasks: Tasks that are marked as completed.
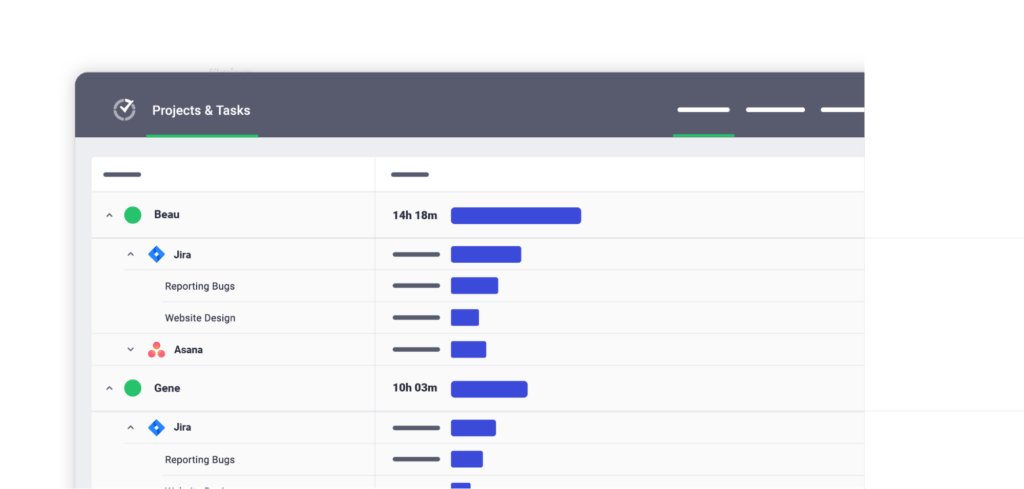
Note: Only admins can assign projects to team members.
F. Productivity ratings
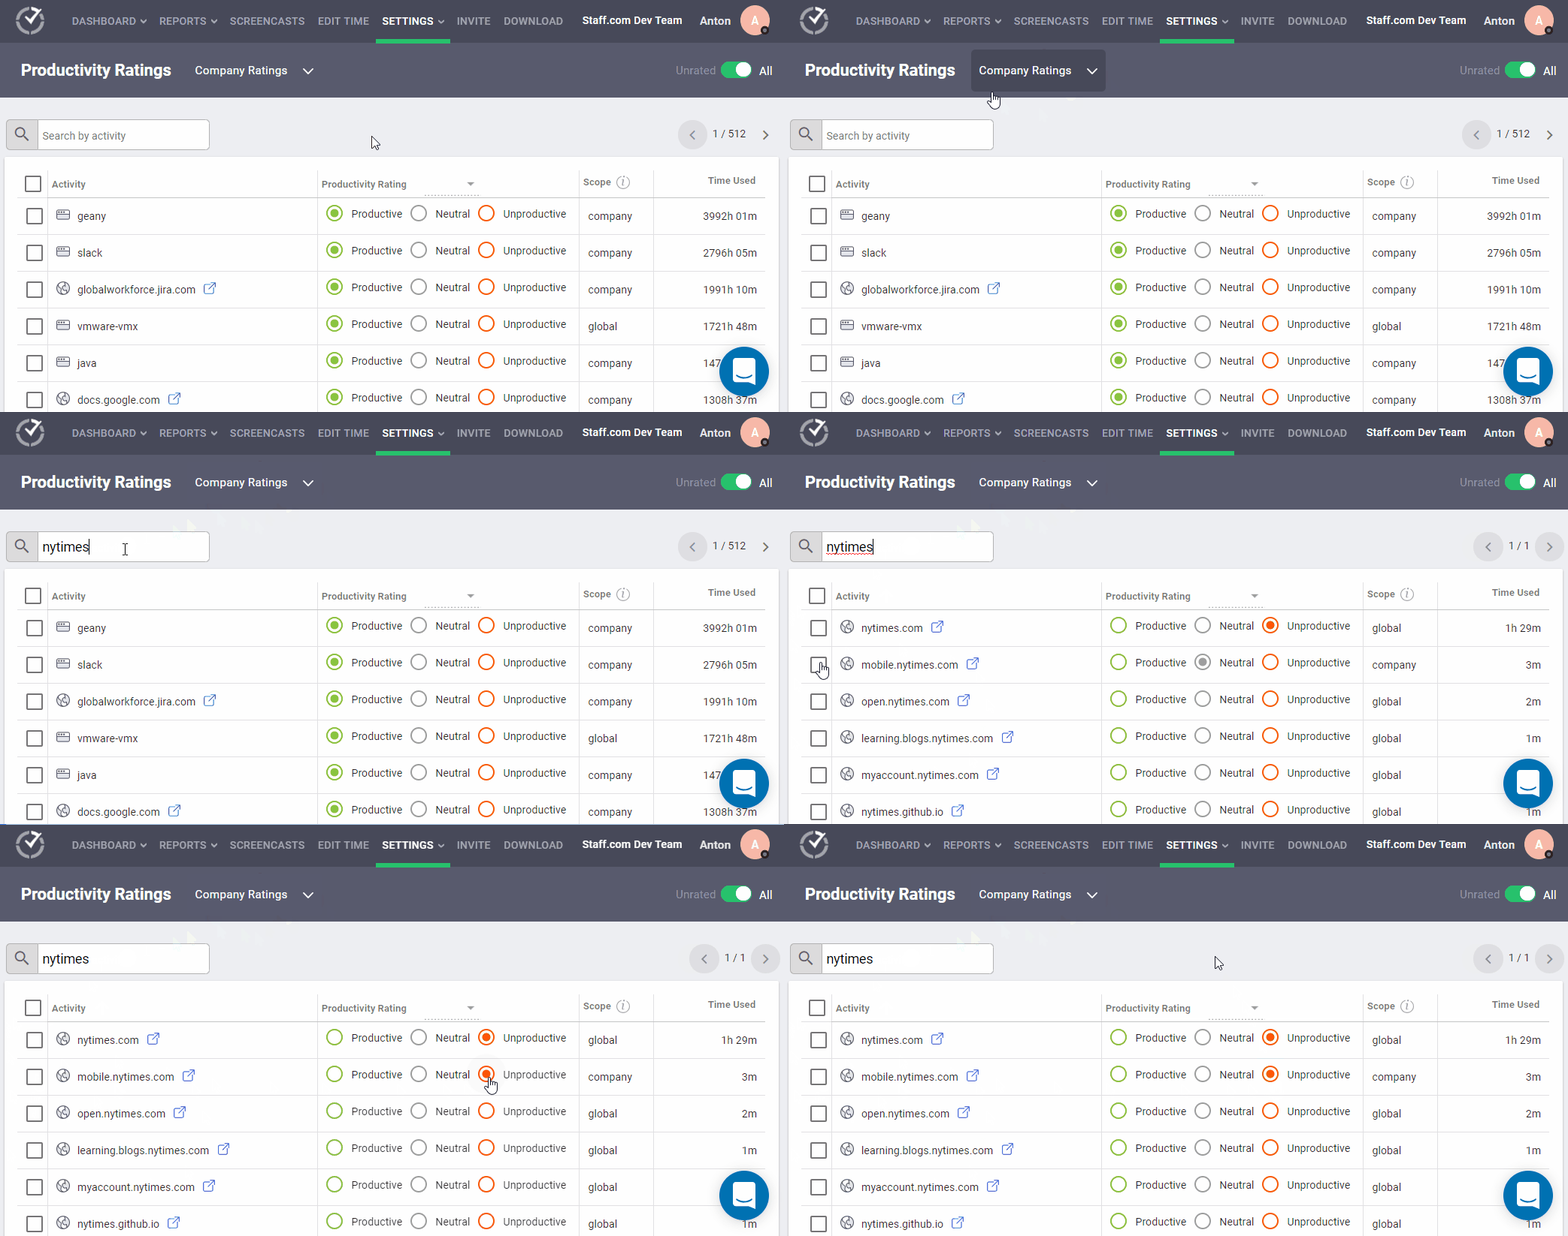
Time Doctor also allows you to set productivity ratings for each website and app based on whether they’re relevant to work.
The different productivity ratings are:
- Productive.
- Unproductive.
- Neutral.
- Unrated.
For example, you can rate Netflix as ‘Unproductive’ and GitHub as ‘Productive’ for your software development team.
G. Productivity reports
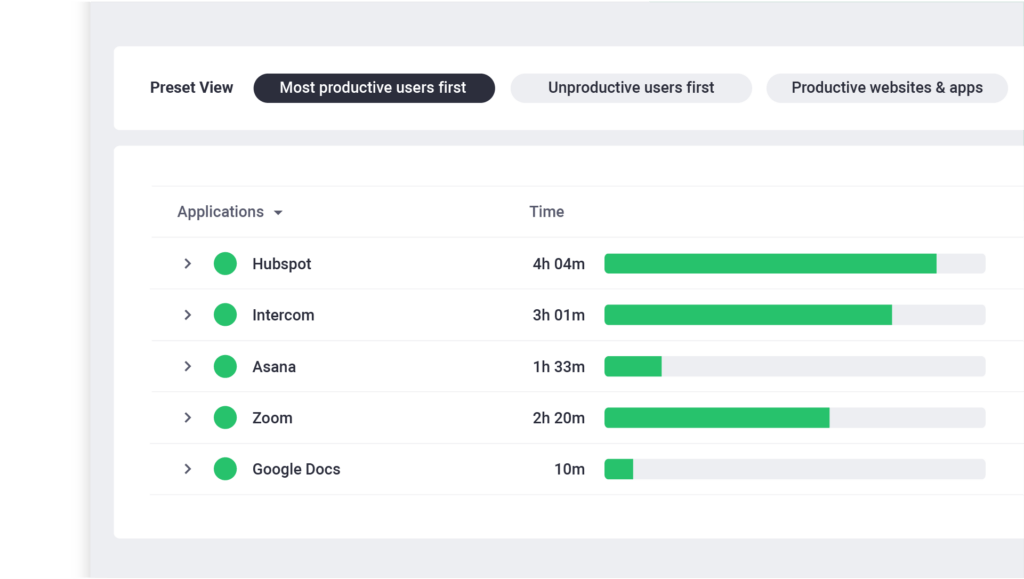
Time Doctor can generate various productivity reports based on the time tracked data. From these reports, you can spot employee productivity patterns like weaknesses and strengths.
Here are the different types of productivity reports:
- Activity summary report: Displays an employee’s active, unproductive, productive, manual, and mobile time for a selected time range.
- Timeline report: Shows the time an employee spends working and taking
breaks.
- Hours tracked report: Shows your team’s work hour data during a specific date range.
- Projects & tasks report: Shows how much time an employee spends on different tasks and projects.
- Custom export report: Lets you choose what to include in an exported report without downloading individual reports.
- Web & app usage report: Lists the sites and applications employees use during work hours, and the time they spend on each of them.
H. Payroll management
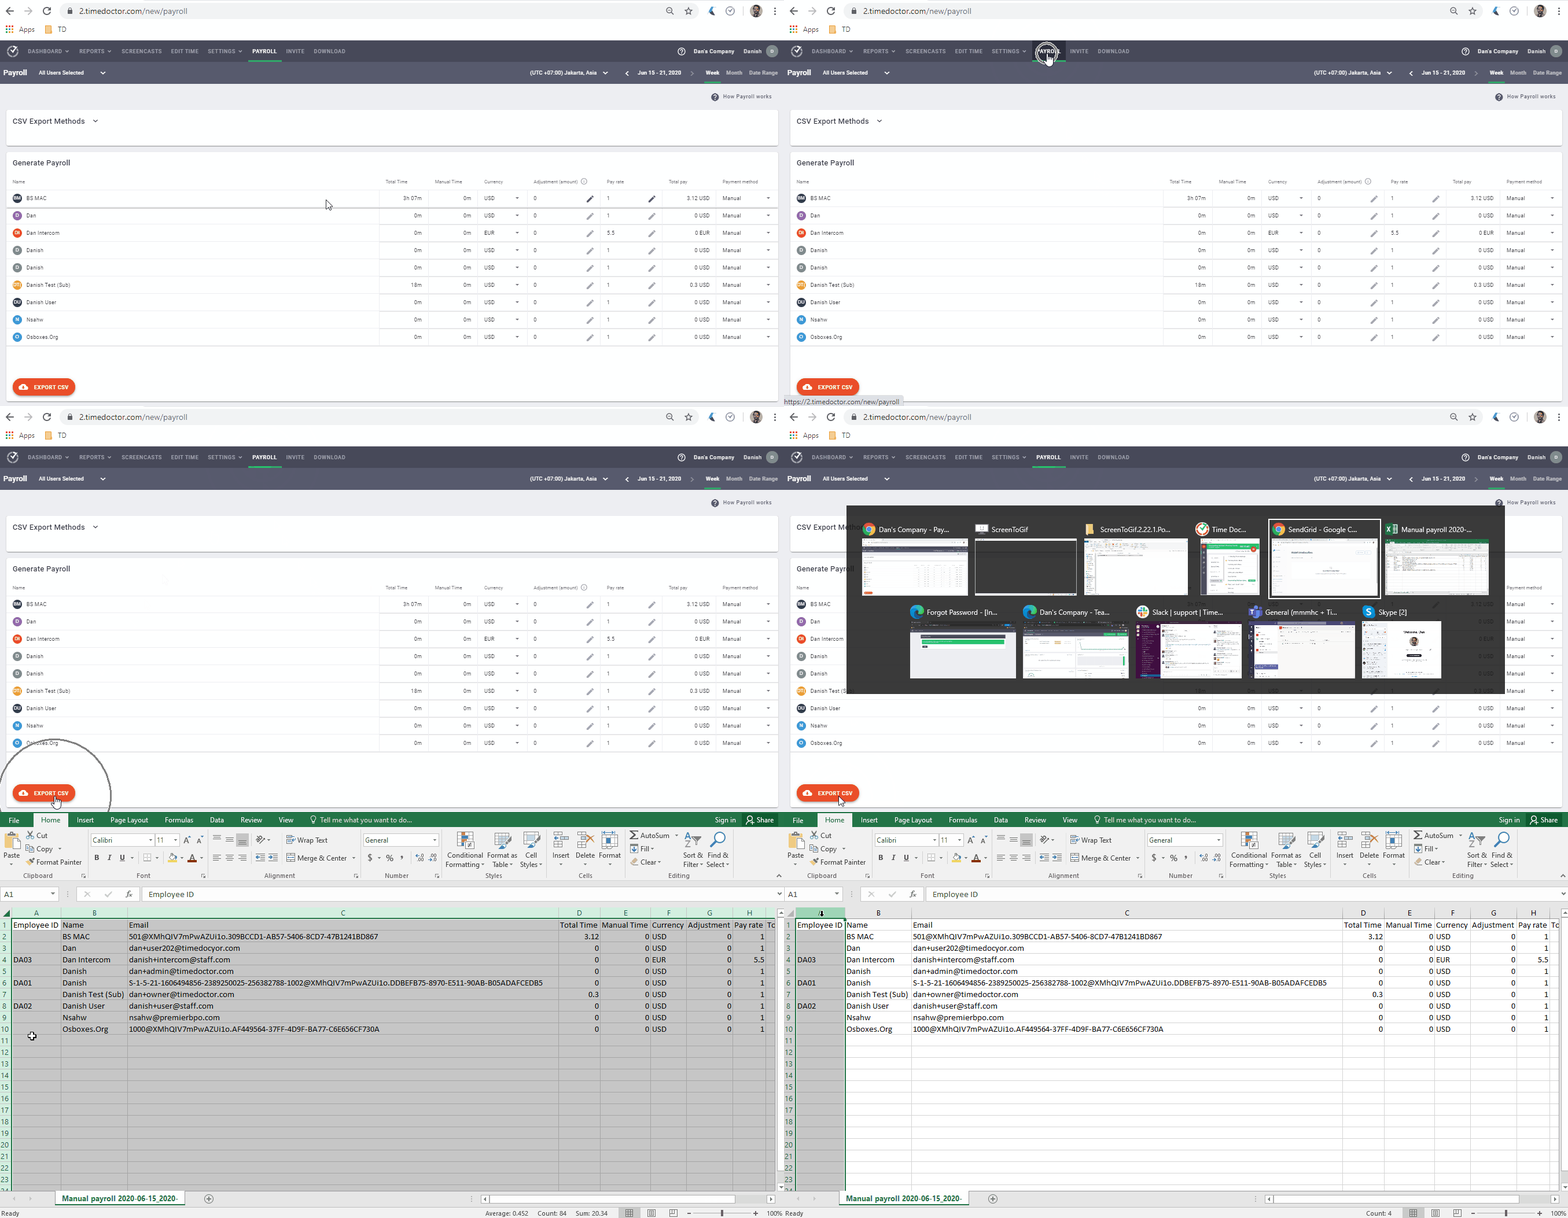
Time Doctor’s payroll feature lets you pay employees directly from popular payment gateways like Gusto, ADP, Paypal, and Wise.
It also lets you customize factors like payment methods, pay period, payment currencies, and payment rates.
Check out Time Doctor’s other features here.
Pricing
Time Doctor offers a 14-day free trial (no credit card required). Its paid plans start at $7/user per month.
Customer ratings
- Capterra: 4.5/5 (400+ reviews)
- G2: 4.4/5 (280+ reviews)
2. Clockify
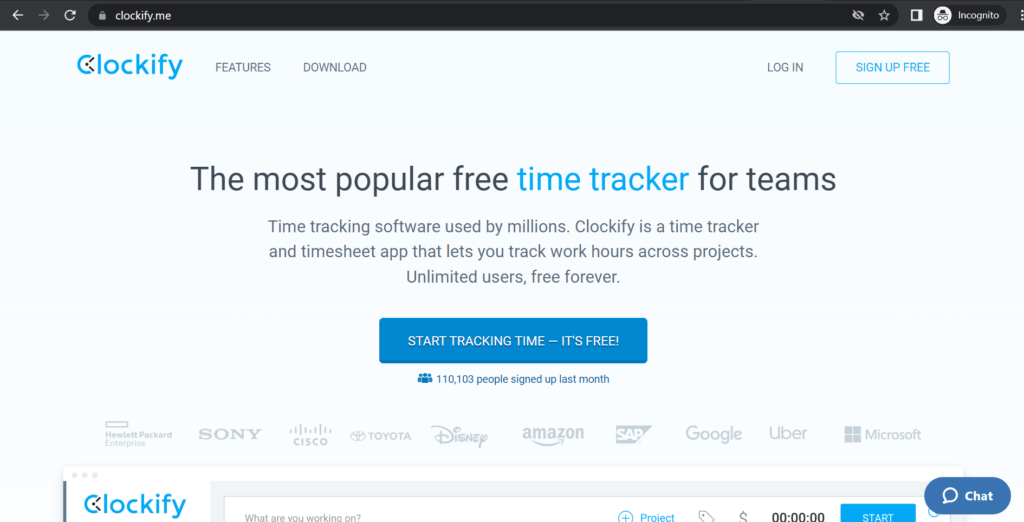
Clockify is a time tracking and project management tool offering task management, reporting, invoicing, and scheduling features.
Key features
- Lets employees clock in and out with a PIN code.
- Generates reports showing the tasks each employee worked on, displays the team’s time, and more.
- Provides an overview of employee time from the dashboard.
- Helps you visualize your tasks and blocks out the activity by enabling the Calendar view.
Check out this comprehensive review on Clockify.
Pricing
Clockify offers a free plan with basic time tracking features. Its paid plans start at $4.99/user per month.
Customer ratings
- Capterra: 4.7/5 (4,110+ reviews)
- G2: 4.5/5 (120+ reviews)
3. Monitask
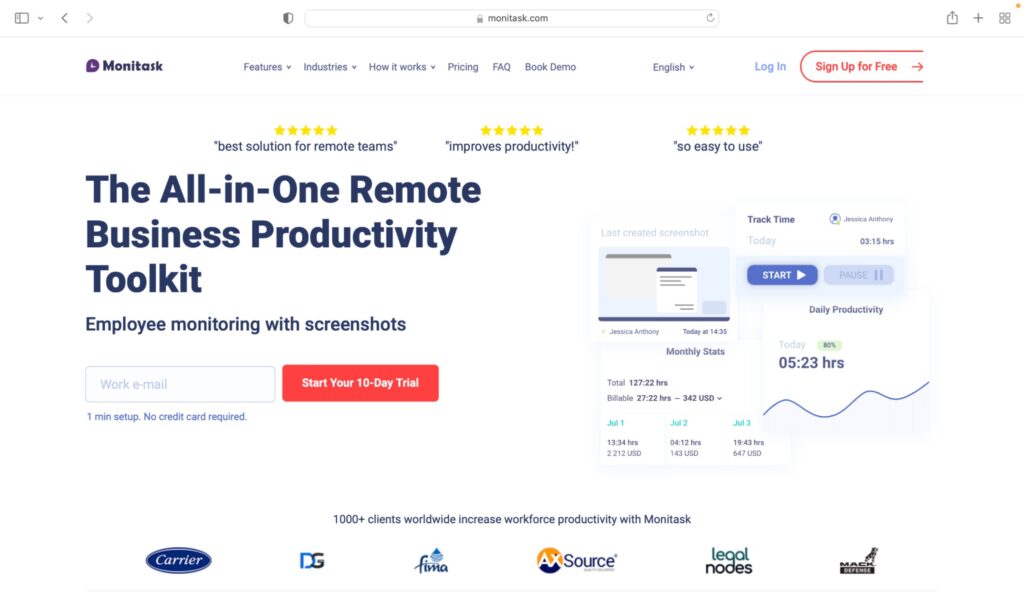
Monitask is an all-in-one remote time tracking software that lets employees and freelancers manually track the time worked for multiple projects.
Key features
- Offers free hourly, daily, weekly, and monthly printable timesheet templates.
- Lets you track your team members’ time and productivity during a project
- Provides remote employee monitoring features, like dashboard and idle time removal, to increase transparency.
- Allows you to take screenshots of employees’ work.
Pricing
Monitask offers a free plan with basic time tracking features. Its paid plans start at $5.99/user per month.
Customer ratings
- Capterra: 4.8/5 (90+ reviews)
- G2: 4.4/5 (10+ reviews)
4. TimeCamp

TimeCamp is a time tracking tool that aims to maximize project profitability with reporting, attendance management, and other features.
Key features
- Lets you add, edit, and delete time entries in graphic timesheets.
- Automatically switches to idle when the employee isn’t working.
- Integrates with other tools like Github and Pipedream via API.
- Offers time tracking desktop app for Linux, Windows, and Mac OS and mobile app for iOS and Android.
Pricing
TimeCamp offers a free plan with basic features. Its paid plans start at $7/user per month.
Customer ratings
- Capterra: 4.7/5 (550+ reviews)
- G2: 4.6/5 (180+ reviews)
Wrapping up
Redmine time tracking helps employees record the time they spend solving an issue or working on a specific project.
However, it offers only basic time tracking features and doesn’t offer an automatic timer. But you don’t need to completely give up Redmine.
A better solution is to integrate Redmine with a dedicated time tracking tool like Time Doctor. Then you can choose to track time automatically or interactively, generate detailed productivity reports, easily run payroll, and much more.
Sign-up for Time Doctor’s 14-day free trial and experience advanced time tracking!


