Want to know how to create and use Zoom breakout rooms?
With COVID-19, the way we live and work has changed rapidly. Taking our work out of the boardroom and into the living room means rethinking the way we communicate.
Fortunately, tools like Zoom help us stay connected even when working from home.
Besides supporting large video conferences, Zoom also allows hosts of the main meeting to separate meeting participants into breakout rooms for smaller, private group discussions.
If you don’t know how to use the breakout room feature, don’t worry, we’ll explain everything you need to know about creating and managing them.
Table of Contents
- What are Zoom breakout rooms?
- How to do breakout rooms in Zoom
- How to manage a Zoom breakout room
- How to participate in breakout rooms
- 8 things to keep in mind for Zoom breakout room success
- Breakout rooms FAQs
Let’s get started.
What are Zoom breakout rooms?
Breakout rooms are private sessions that are split off from your main Zoom meeting. The meeting host of the main session can select participants to allocate into various breakout rooms.
Divide your main Zoom meeting into separate sessions, and then bring these small groups back together to resume the larger group meeting.
The benefit?
Participants can have smaller group discussions, completely separated from the main meeting session. Each participant has full video, audio, and screen share capabilities.
Anyone with a Zoom account can participate in breakout rooms for free by signing in to their profile and enabling the feature.
However, to create a breakout room, you must first enable this setting on Zoom.
You can then group individuals into up to 50 separate sessions at a time, either manually or automatically — and even switch participants between sessions.
Note: Breakout rooms can only be created if you are using a Zoom desktop client. You can’t create or manage a breakout room via your mobile, but you can still join them.
How to do breakout rooms in Zoom
To help you use breakout rooms with ease, we’ve provided a detailed guide below:
A. How to enable breakout rooms using the Zoom desktop client (Mac and PC)
The breakout room feature is one of Zoom’s more unique features as Microsoft Teams and Google Meet still don’t offer this option.
But before you can create Zoom breakout sessions as a meeting host, you must enable the feature from the Zoom desktop.
Follow these steps to enable Zoom breakout rooms:
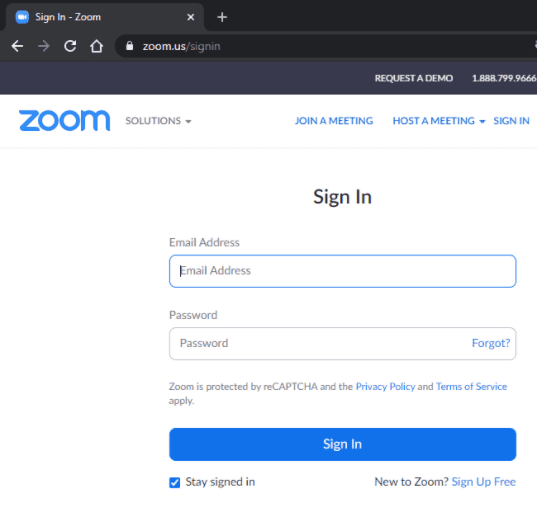
Step 1: Sign in to your Zoom account via the website zoom.us. Ensure that you’re signing in to the website and not the mobile app.
Step 2: Click on “My Account” in the top-right corner.
Step 3: In the left sidebar, under the heading “Personal,” click either “Settings” or “Account
Settings”. (Some versions of Zoom have “Settings” while others have “Account Settings.”)
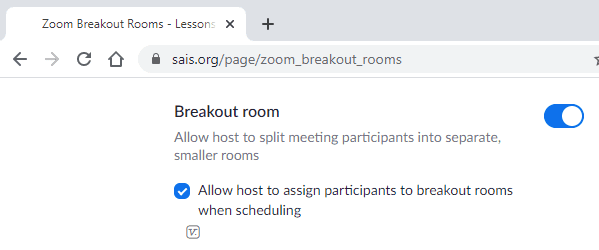
Step 4: On the meeting tab, navigate to the Breakout Room option and confirm that this setting is enabled. If it’s disabled, click the toggle to enable breakout rooms. A verification dialog may be displayed, choose “Turn On” to verify the change.
Step 5: Click on the toggle button, and enable breakout rooms.
B. How to create breakout rooms in your Zoom call
Here are the steps to create breakout sessions whenever you host a main meeting:
Step 1: On your Mac or PC, log in to the Zoom app.
Step 2: To schedule a meeting, you can select either “Schedule” or “New Meeting”. Remember, you will need to be the host in order to create breakout rooms.
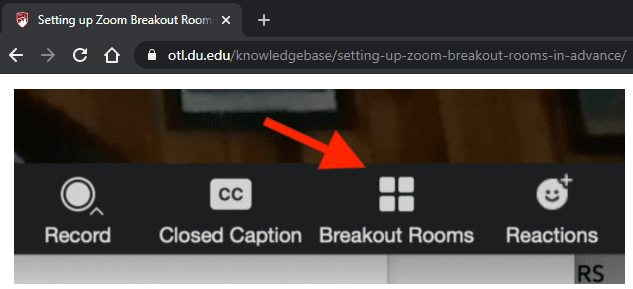
Step 3: When the Zoom session begins, click the Breakout Rooms icon in the bottom toolbar.
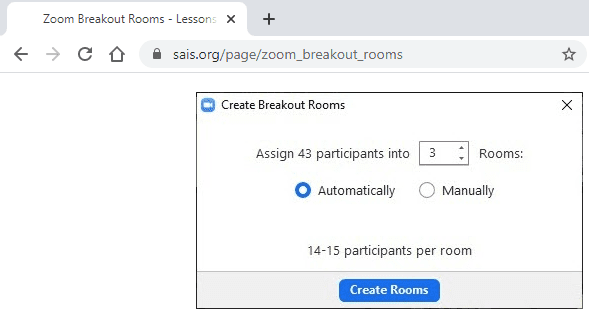
Step 4: Choose whether you want Zoom to sort your breakout room participants into the number of rooms you select automatically. Alternatively, you can sort participants into rooms manually during your main Zoom meeting.
Step 5: Once you’ve chosen the desired setting (automatic or manual), click the button that says “Create Rooms”.
C. How to pre-assign participants
It’s quite simple to manually assign participants to breakout rooms during an active Zoom call when the group is smaller.
But when you’re trying to assign a bigger group of people to specific rooms (for example, when you need to assign students for a university lecture), it can become challenging and time-consuming.
For this reason, Zoom has a CSV File Import feature.
So you can either assign students (or any participant) manually or use the CSV file import feature. Here’s how to do both methods:
Method 1: Pre assign participants manually
If you are going to assign participants to breakout rooms manually, you’ll have to move breakout room participants from the main meeting room.
Here are the steps for breakout room assignment:
Step 1: Ensure that you are signed in to the web portal with your username and password.
Step 2: Click the “Meetings” tab and then click “Schedule a meeting”.
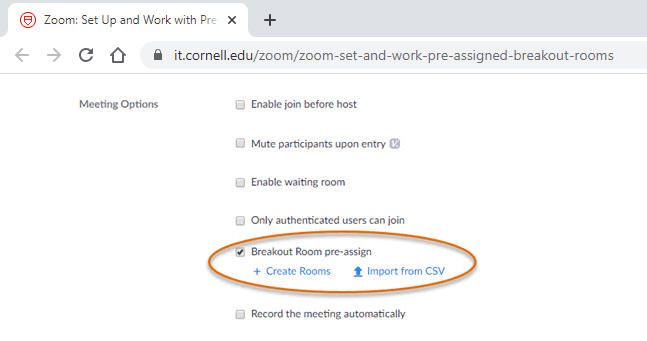
Step 3: Go to the Meeting Option section and choose “Breakout Room pre assign” and click on “Create Rooms”.

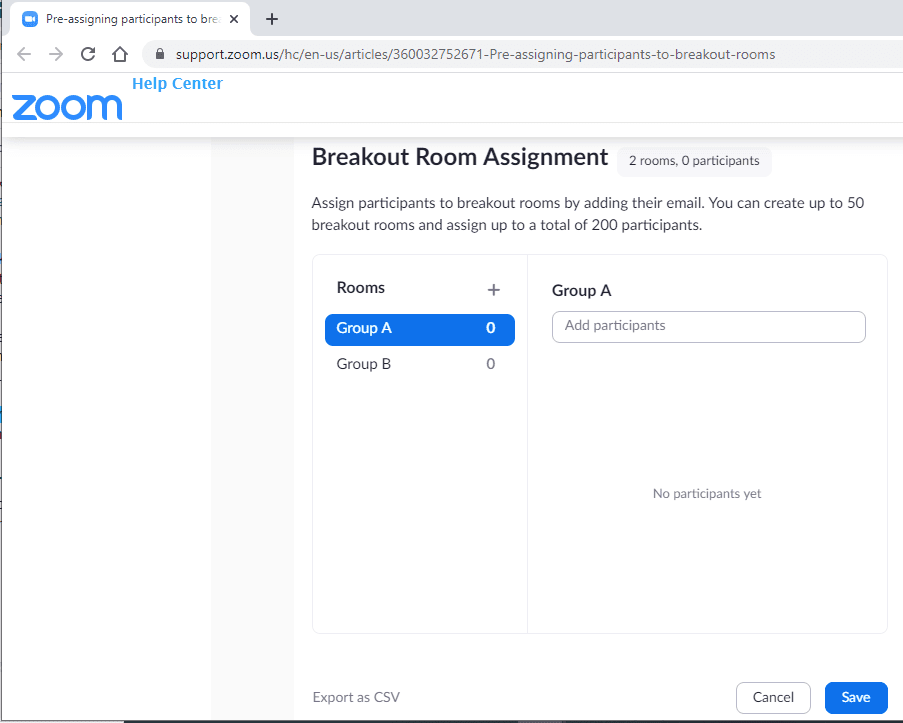
Step 4: Next to “Rooms”, click on the “+” to add rooms.
Step 5: When you hover over the default breakout room name, a pencil icon will appear. Click on the pencil to rename the breakout room.
Step 6: For breakout room assignment, you can search for the person’s name or email address to assign them to the breakout room. This will be in the “Add participants” text box.
Method 2: Assign participants using CSV file import
Rather than doing it manually, there is an easier option for creating pre-assigned participants.
Here’s how to go about pre-assigning breakout rooms:
Step 1: Sign in to the Zoom web portal.
Step 2: Click on the “Meetings” tab and schedule a meeting.
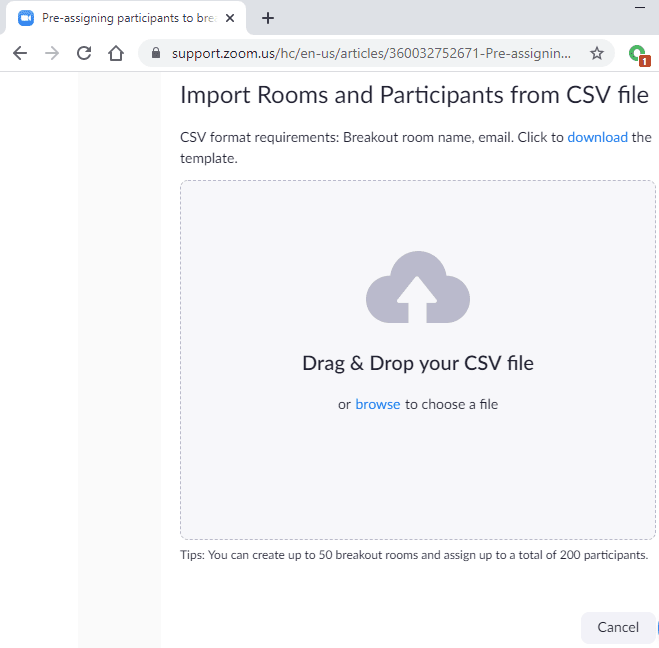
Step 3: In the “Meeting Options” section, select “Breakout Room Pre Assign” and click “Import from CSV”.
Step 4: Click “download” for a sample CSV file that you can fill out.
Step 5: Open the CSV file. You can use Microsoft Excel or similar spreadsheet software.
Step 6: Fill out the “Pre Assign Room Name” column with the name you want for the breakout room.
Step 7: Fill out the “Email Address” column with the assigned participant’s email address.
Step 8: Save the completed file.
Step 9: Drag and drop the file in the Zoom web portal.
Zoom will verify that the participant whose email address was entered has a Zoom account.
Keep in mind that the maximum number of assigned participants in your CSV file is 200.
How to manage a Zoom breakout room
Once you’ve learned how to enable, create, and assign people to breakout rooms, there are a few things you need to know about managing breakout rooms.
Just follow these simple steps to manage a breakout room efficiently:
Step 1: Start an instant or scheduled meeting. From the main meeting menu, select “Open All Rooms” to officially begin your breakout session.
Step 2: When you create rooms, they will be shown in a dialogue box. Clicking on a room will show who’s in it.
Step 3: Hover over a room to “Move”, “Rename”, “Delete” or “Reassign” participants of the meeting from various breakout rooms.

Step 4: Selecting the “Options” button will allow you to choose your various breakout room options/meeting settings.
Here you can:
- Set breakout rooms to close after a certain amount of time if desired.
- Decide how much control participants can have over their time in these sessions.
- Set a countdown timer to inform participants of the time remaining in a session. The participants will be informed when the session time expires or when the host closes it.
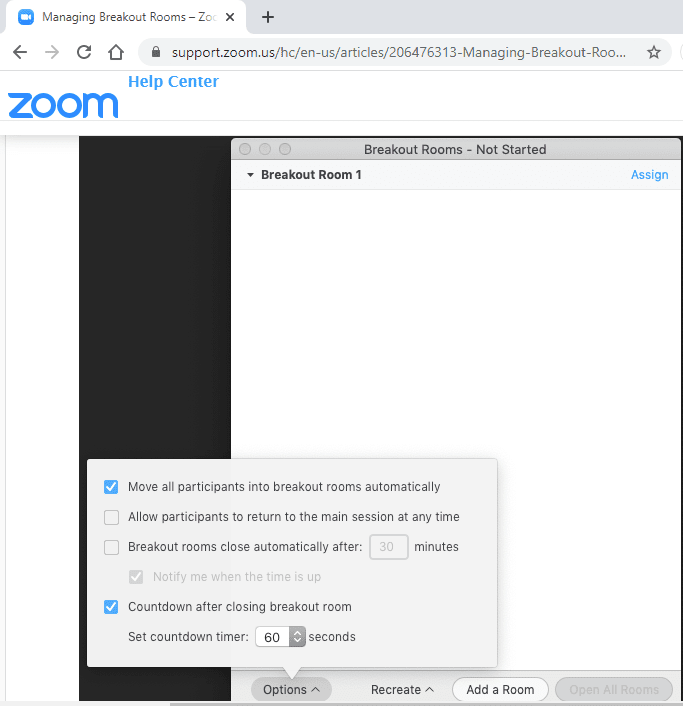
Step 5: Selecting “Recreate Rooms” will shuffle breakout room participants for future breakout rooms into any order you choose.
Step 6: Click on “Close all rooms” to close the session. This will give participants exactly 1 minute to wrap up their side discussions. After the rooms are closed, all participants return to the main room screen.
Step 7: As a host or co-host, you can jump to a different breakout room whenever you want during the session.
How to participate in breakout rooms
There are two ways to join a breakout room — either you join an assigned breakout room as chosen by the host or you can choose which breakout room you want to join, as long as the host of the main session allows this.
A. How to join breakout rooms
To join a breakout room session, you will need to have been invited by the host (assuming you are not the host.)
Here’s how to join a pre-assigned breakout room:
Step 1: Once you join the main Zoom session, the host will invite you to join the breakout room.
Step 2: An invite will appear in a pop-up window. Click “Join Breakout Room” to continue.
Step 3: You can choose “Later” and join in later by clicking the “Breakout Rooms” option in your meeting controls.
Step 4: Click “Join Breakout Room”.

B. How to self-select a breakout room to join as a non-host
A host can allow a participant to self-select and choose which breakout rooms they want to join. If you self-select a breakout room, you can enter and leave rooms freely from the main session.
Here are the steps to do this:
Step 1: Select the “Breakout Rooms” option in your meeting controls and a list of open breakout rooms created by the host will be visible.
Step 2: Next to the Breakout Room you choose, click “Join” and confirm by clicking “Join” again.
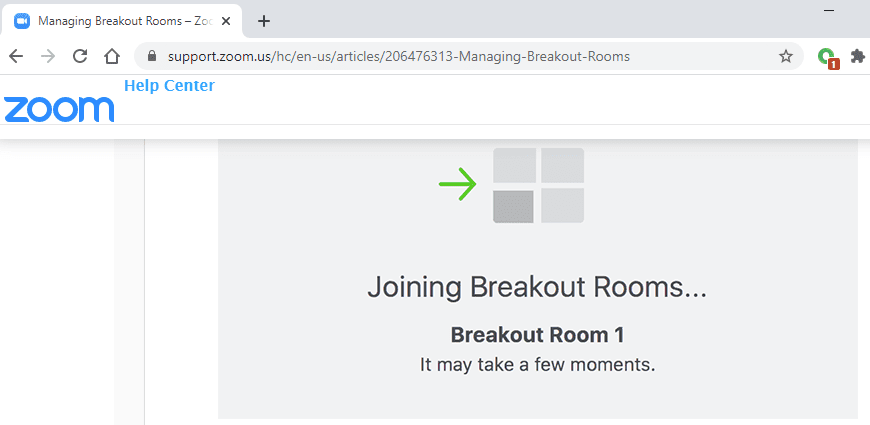
Step 3: Click “Leave Room” to return to the main session.
C. How to record in a breakout room
Zoom permits local recording privileges to both free and paid subscriber accounts.
This allows Zoom meeting participants to record and store a video (with full audio)of the session locally onto their computer.
Follow these steps to record in a breakout room:
Step 1: If you want to record a breakout session, ask the host for permission first.
Step 2: The host needs to “allow” recording privileges before they open the breakout room. Alternatively, they can join your breakout room session and allow recording.
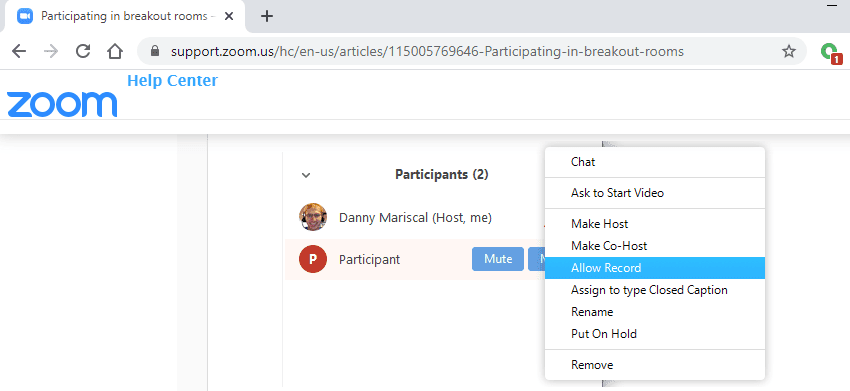
Step 3: In the meeting controls section, click “Record” to start recording.
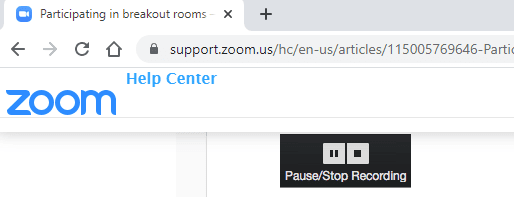
Step 4: You can pause or stop a recording by clicking the pause or stop icon in the meeting controls.
Check out this short video to learn why Time Doctor is a great tool for remote teams:
8 things to keep in mind for Zoom breakout room success
When it comes to using breakout rooms successfully, practice makes perfect.
Once you know how to use breakout rooms, it becomes really easy to create your own room every day.
Here are some handy tips to help you out:
1. Plan the details beforehand.
Ask yourself:
- How many breakout rooms do I need?
- How many participants should each room have?
- Most importantly, should I manually assign participants to rooms or allow Zoom to do this randomly for me?
You can also allow participants to choose a different room.
2. You can start a whiteboard Zoom session in Breakout Rooms. This will allow participants to view and annotate within the assigned room.
3. As the meeting host, you can create up to 50 breakout sessions in a central Zoom meeting room.
4. As a Zoom user client, if you plan on making use of breakout rooms, there are some limitations you need to keep in mind.
The number of breakout rooms and participants is limited to:
- For 20 rooms: maximum of 500 participants per room.
- For 30 rooms: maximum of 400 participants per room.
- For 50 rooms: maximum of 200 participants per room.
5. During a breakout room session, in the event that a participant needs the meeting host to join their meeting, they can click on “Ask for Help”. The host will then be prompted to “Join Breakout Room” in the notification pop-up. They can click on it to join the Zoom session.
6. To manage breakout rooms, you need to have the latest version of the Zoom app.
7. Zoom mobile app users can’t manage breakout rooms. While you can still join and participate in a breakout room from your mobile phone, you will not be able to create or manage your own room.
8. A co-host’s breakout session will begin in the room they’ve been assigned to by the host. Thereafter the co-host can enter and leave rooms freely, at any time.
Wrapping up
Zoom’s Breakout Rooms feature can be a valuable tool for collaboration and discussions because they allow people to have a meeting in a smaller group, completely isolated from the main room.
Share ideas, provide individual feedback, or conduct a smaller brainstorming session during a virtual meeting. You can use breakout rooms for any sort of discussion.
Simply follow the steps in this guide, and you too can make the most of this valuable feature.
And once you’re done, you’ll be able to create your own room for quick breakout sessions in no time!
Breakout rooms FAQs
As long as your account settings have owner or admin privileges, you’ll be able to set up Zoom breakout rooms.
To check if you have Zoom’s breakout rooms feature enabled, navigate to the Breakout Room option on the Meeting tab and verify that the toggle switch is enabled.
Typically, the meeting host will assign you to your designated session, and either send you there directly or send you an assigned participants invite that you’ll need to accept in order to join.

